Water damage can strike unexpectedly, and its consequences can be devastating to a property. Whether caused by natural disasters like floods or storms or by internal factors like plumbing issues or leaks, the damage it leaves behind can be overwhelming. Swift and effective action is critical in minimizing the destruction and ensuring the property is restored to its original condition. This is where a comprehensive checklist for water damage restoration comes in handy.
Step 1: Assess the Situation
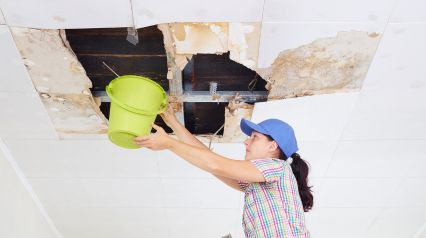
Before jumping into the restoration process, the first step is to assess the extent of the damage. This is a critical part of water damage cleanup, as it helps determine the necessary actions and resources. Start by identifying the affected areas, which could include walls, floors, ceilings, furniture, and electrical systems. Inspect for standing water, dampness, or signs of mold growth, as these indicate the severity of the issue.
Once the affected areas are identified, it’s crucial to assess whether the water is contaminated. Category 1 (clean water) from broken pipes or appliances can typically be cleaned safely, while Category 2 (gray water) and Category 3 (black water) require more stringent protocols due to potential health hazards.
Step 2: Safety First
Before you start any cleanup, ensure the safety of everyone involved. If the water has affected electrical systems or there’s standing water near outlets or appliances, it’s essential to cut off the electricity to prevent electrocution. Wear protective clothing, such as gloves, masks, and boots, to shield yourself from contaminated water and mold spores. If you’re dealing with black water, which could contain hazardous substances like sewage, it is recommended to hire a professional water damage restoration company for cleanup.
Step 3: Remove Standing Water
Once the area is secure, begin removing any standing water. The quicker you act, the less damage your property will sustain. You can use a wet/dry vacuum for smaller areas, but for significant flooding, it’s best to call in professionals equipped with industrial-grade pumps and vacuums to ensure thorough water removal. The longer the water sits, the higher the risk of structural damage and mold growth, so prompt water removal is crucial.
Step 4: Dry the Area
After removing the standing water, the next critical step in water damage restoration is drying the area thoroughly. Using high-powered fans, dehumidifiers, and moisture meters, professionals can accelerate the drying process. It’s important to dry out the affected areas as quickly as possible to prevent mold growth, which can begin within 24-48 hours after water exposure.
Depending on the severity of the water damage, some materials, such as carpets, insulation, or drywall, may need to be removed and replaced. This ensures the drying process is thorough and helps prevent any residual moisture that could foster mold and mildew growth.
Step 5: Clean and Sanitize
Once the affected areas are dry, water damage cleanup takes the next step: cleaning and sanitizing the space. Using appropriate cleaning agents and disinfectants, all surfaces need to be thoroughly cleaned to eliminate bacteria, mold spores, and any other contaminants that could pose a health risk. This step is essential, especially when dealing with gray or black water, as it can contain harmful pathogens.
Furniture, personal belongings, and other items that were affected by the water should also be cleaned and sanitized to prevent the spread of bacteria and mold.
Step 6: Repair and Restore
With the area now cleaned and sanitized, it’s time for repairs and restoration. This may involve patching up walls, replacing flooring, or restoring any other structural elements that were damaged. If your home or business has had extensive water damage, you may need to work with contractors and specialists to restore damaged systems, such as electrical, plumbing, or HVAC systems.
Once the structural repairs are made, it’s time to begin restoring your property to its pre-damaged condition. This includes repainting, replacing furniture, and redoing any aesthetic elements that were compromised.
Step 7: Final Inspection and Prevention
The last step in the water damage restoration process is a final inspection. Ensure that all repairs are complete and the property is fully restored. You should also take preventative measures to avoid future water damage. This might involve sealing leaks, installing sump pumps, or improving your home’s drainage system.
Regular maintenance, including checking plumbing systems, cleaning gutters, and inspecting the roof, can prevent water damage from occurring again in the future.
Conclusion
Water damage can be stressful and overwhelming, but with the right approach, it is possible to restore your property and prevent long-term issues. Using a comprehensive checklist for water damage restoration ensures that every step of the cleanup and repair process is carefully followed. Prompt action, safety precautions, and professional expertise are key to a successful water damage cleanup and restoring your property to its original state.